
Zero to One Hundred Internal SEO and Technical SEO

In the previous chapter, we covered content-related on-page SEO techniques. Now, we’ll take a look at the more technical aspects.
| Guide to this article (Click on the title links below to jump to the article you want!) |
Internal linking
Internal linking is one of the most overlooked SEO practices. Yes, external backlinks are essential in SEO (we’ll cover that in the next chapter), but having a proper internal link structure is just as important.
Here I will tell you the reason:
- Internal links improve the crawlability of your website. If your pages are well-linked, search engine crawlers have an easier time finding and indexing all of your pages.
- Internal links improve UX and engagement. If you have clear navigation, your visitors will easily find what they need. With relevant text links, they will spend more time with your content instead of leaving the website to find their answers elsewhere.
- Internal links can improve your ranking. Yes, internal links increase link value and are validated. If a page has a lot of internal links with descriptive anchor texts, Google understands the linked page better, considers it important in your page structure, and gives it more importance.
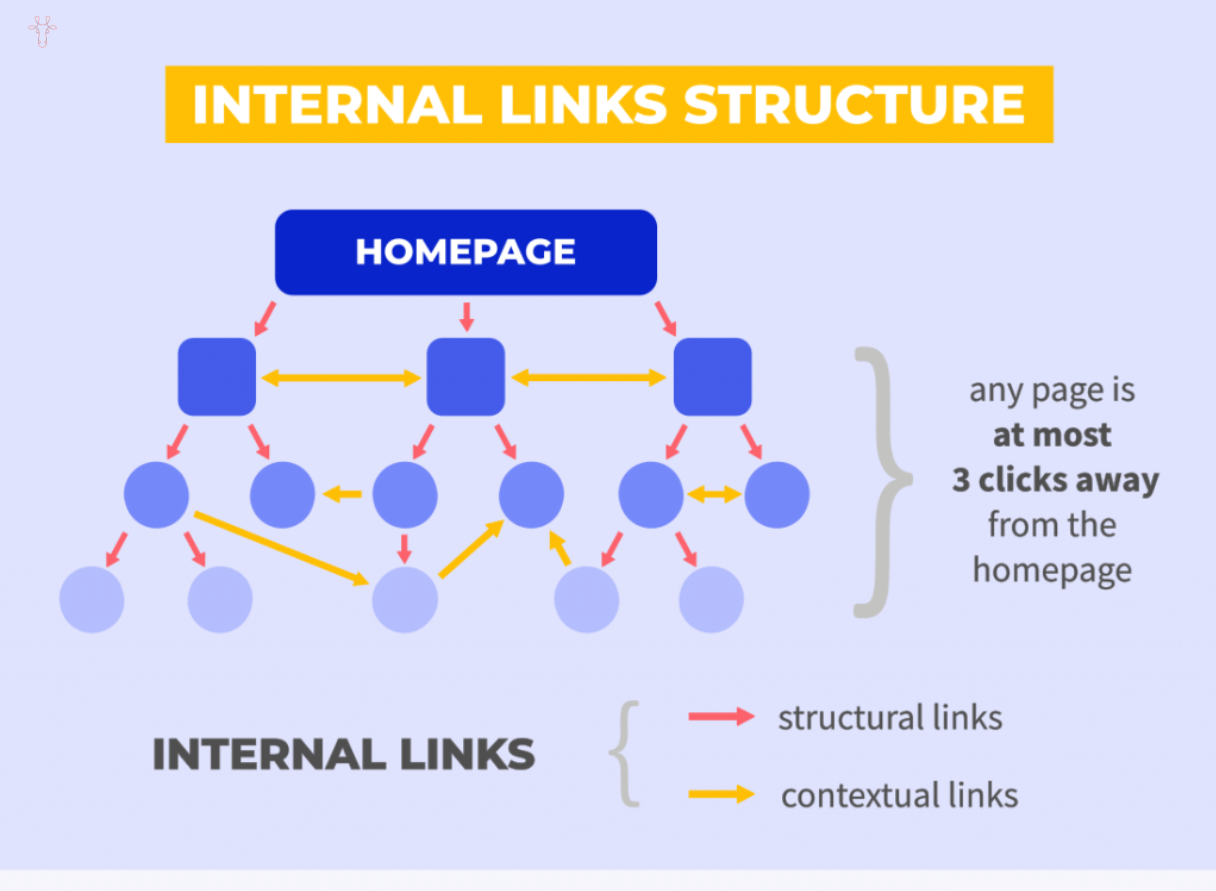
The golden rule of good internal linking is: each page should be no more than 3 clicks away from your home page.
Internal linking structure (inbound links)
The biggest advantage of internal linking? Unlike external links, internal links are completely within your reach. So, how do you get a well-linked website?
Use clear navigation elements.
The key to having a cohesive website is having well-structured navigation elements (like site menus, sidebars, etc.). People are used to navigating websites in a certain way, and you need to make this process as easy and clear as possible for them.
- Menu: A main navigation element that should be clear and descriptive
- Breadcrumbs: Very useful if you have a deeper structure of nested pages.
- Categories: Organize your content into neat, logical categories so people can easily find similar content.
Link from page body
In addition to structured internal links, it’s also a good idea to link to other related pages from within the body of the page. These links include in-text links or “read more” boxes that link to other pages on your website that your visitor might find interesting.
Just learn these two simple exercises:
- Every time you want to publish a new post, think of other content that the reader might find useful and link to it in the text.
- After publishing a new post or page, add a few internal links from other pages related to the topic.
Expert insight from SEO expert Glenn Allsop, founder of DetailedIn the past few months, I’ve reviewed over 1,000 websites. One of the most common mistakes I see is people not making their headlines clickable, especially when it comes to blogs. So they will have a title, post snippet, and a click here or read more button in a vertical line. As you can imagine, “Read more” is the only link they have. Not only does this not create the best user experience, but people naturally tend to click on images and headlines to read something.This is certainly basic advice, but it’s surprising how few sites I come across that follow this type of linking. |
Site maps
A sitemap is also an important factor in both on-page and technical SEO. A sitemap is a structured list of all the pages on a website that is available for search engines to find. Having a sitemap allows crawlers to find all of your pages. What types of sites benefit from a sitemap (according to Google):
- Large websites with hundreds or thousands of pages
- New sites with few or no backlinks
- Websites that don’t have many internal links (e.g., contain pages that don’t have internal links)
- Websites with lots of media files (such as image galleries)
Do you always need a sitemap?No, you don’t. Especially if you have a small website with a few interconnected pages. On the other hand, having a sitemap can never hurt you. Additionally, it contains useful additional information, such as the lastmod attribute – the date the page was last updated so that crawlers know whether the page needs to be recrawled. |
If you’re not sure how to create a sitemap and your website runs on WordPress (which it most likely does), we recommend creating a sitemap with the Yoast SEO plugin.
It will look something like this:
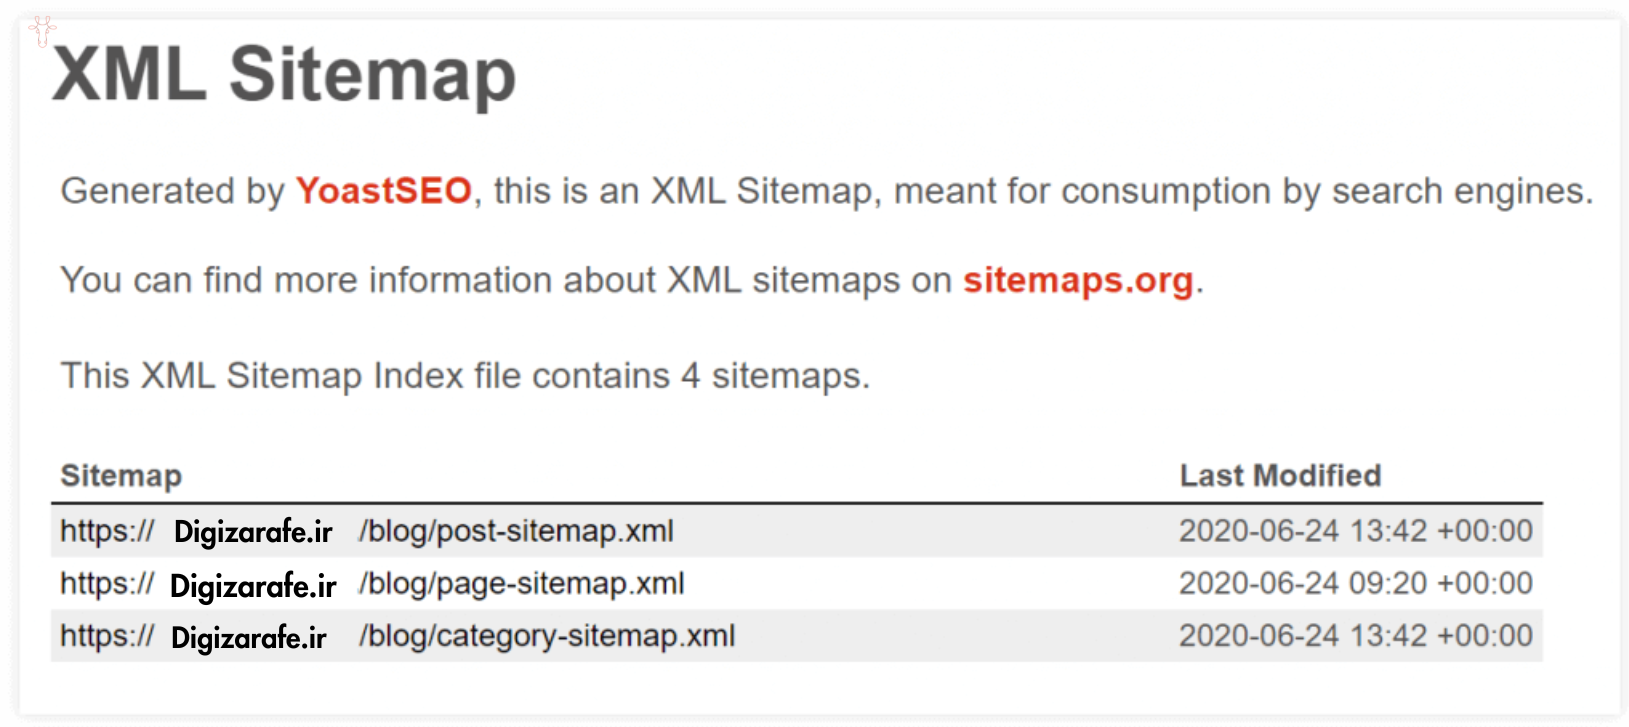
Sitemap in SEO Yoast (XML sitemap)
To let Google know about your sitemap, you can submit it to Google Search Console. Then go to Google Search Console > Sitemaps and paste it into the Add a new sitemap section:
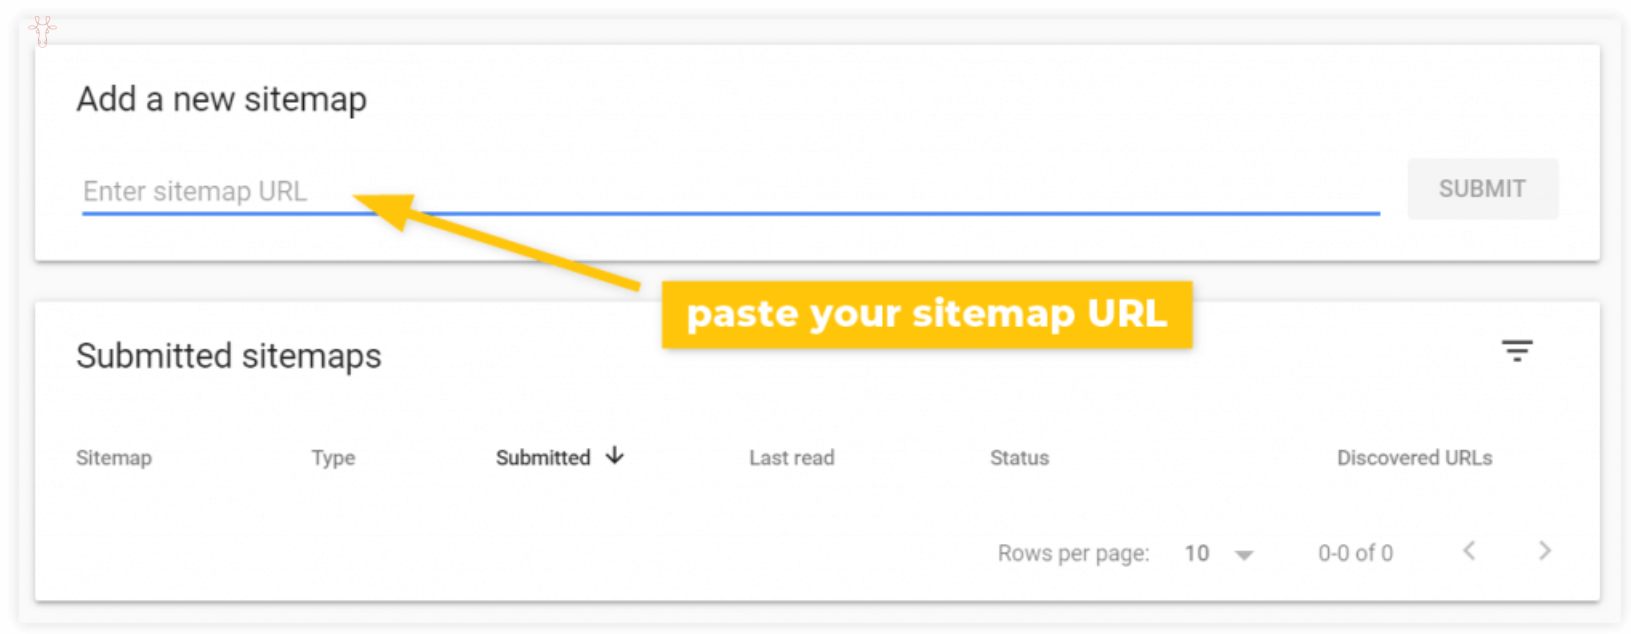
Adding a sitemap to Google Search Console
HTTPS protocol
This one goes without saying. There really is no excuse not to use an SSL certificate these days, especially with free options available (like Let’s Encrypt). The security of your website visitors should be a top priority for you. Not only for obvious reasons, but also because using the HTTPS protocol became a minor ranking signal in 2014.In other words, if you don’t use HTTPS, your website may perform poorly and worse in Google.
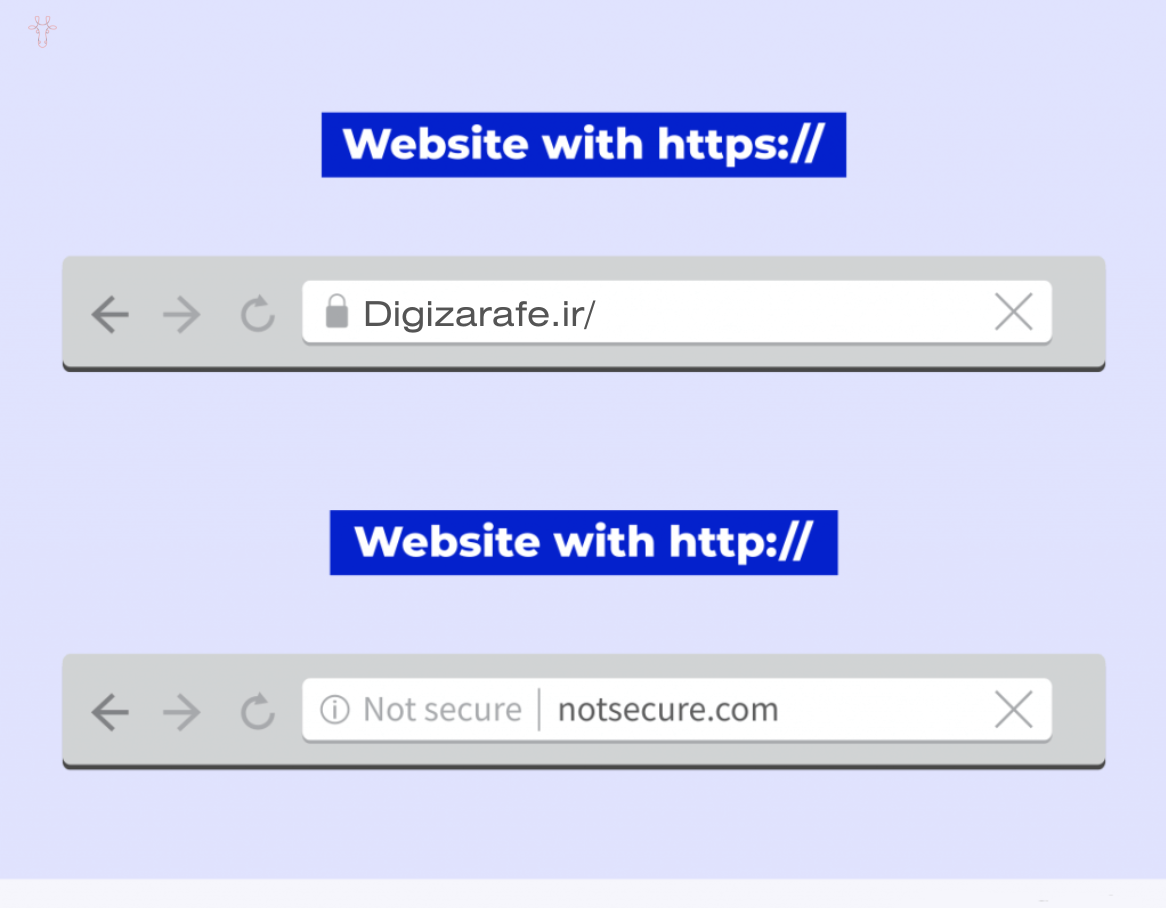
SSL certificate, HTTPS protocol
Mobile compatibility
Since 2019, Google has been using a mobile-first index. This means that most websites are crawled and indexed on their mobile version instead of their desktop version. Having a mobile-friendly website is an essential SEO task. In practice, this means:
- A responsive design
- A menu that is easily navigated on mobile devices
- Compressed images
- No invasive pop-ups
- A legible font
If you are not sure if your website is mobile-friendly, you can test it with a variety of tools available, including Google’s tools, or go to Search Console and see if there are any issues in the mobile usability section.
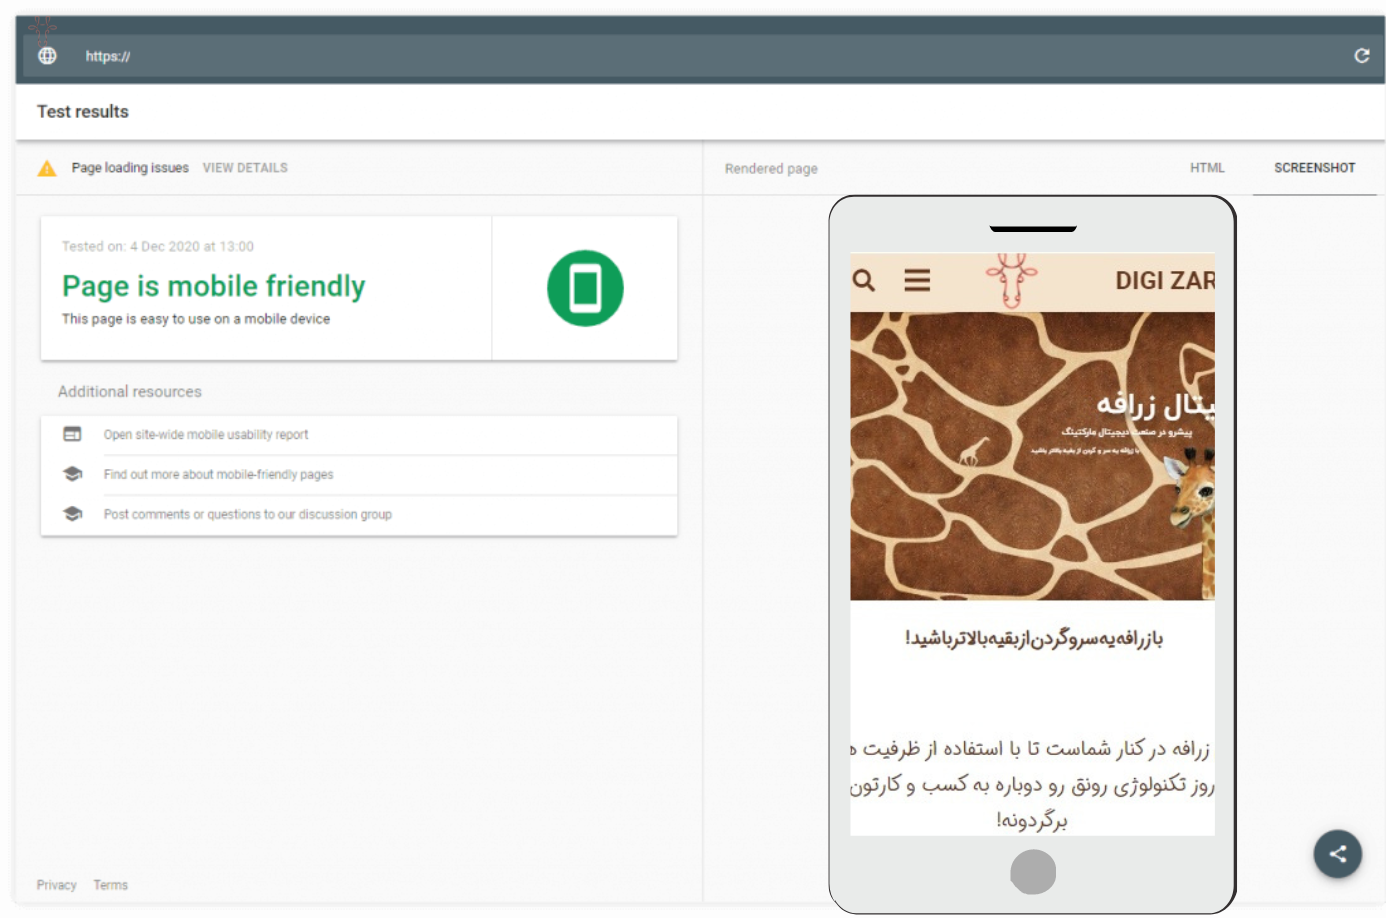
Mobile-friendlyness of site pages
Luckily, most developers these days have mobile compatibility in mind, so if you choose a quality WordPress theme, you’ve made the right choice. But there’s one specific mobile SEO factor you should pay close attention to: page speed.
page speed
Page speed is one of the most important aspects of technical SEO and an essential UX factor. No one wants to wait more than a few seconds for a page to load. Moreover, page speed is a confirmed ranking factor. There are many useful tools that will help you measure your page speed and find the most common page speed problems. For example:
- Google PageSpeed Insights
- GTMetrix
- Pingdom
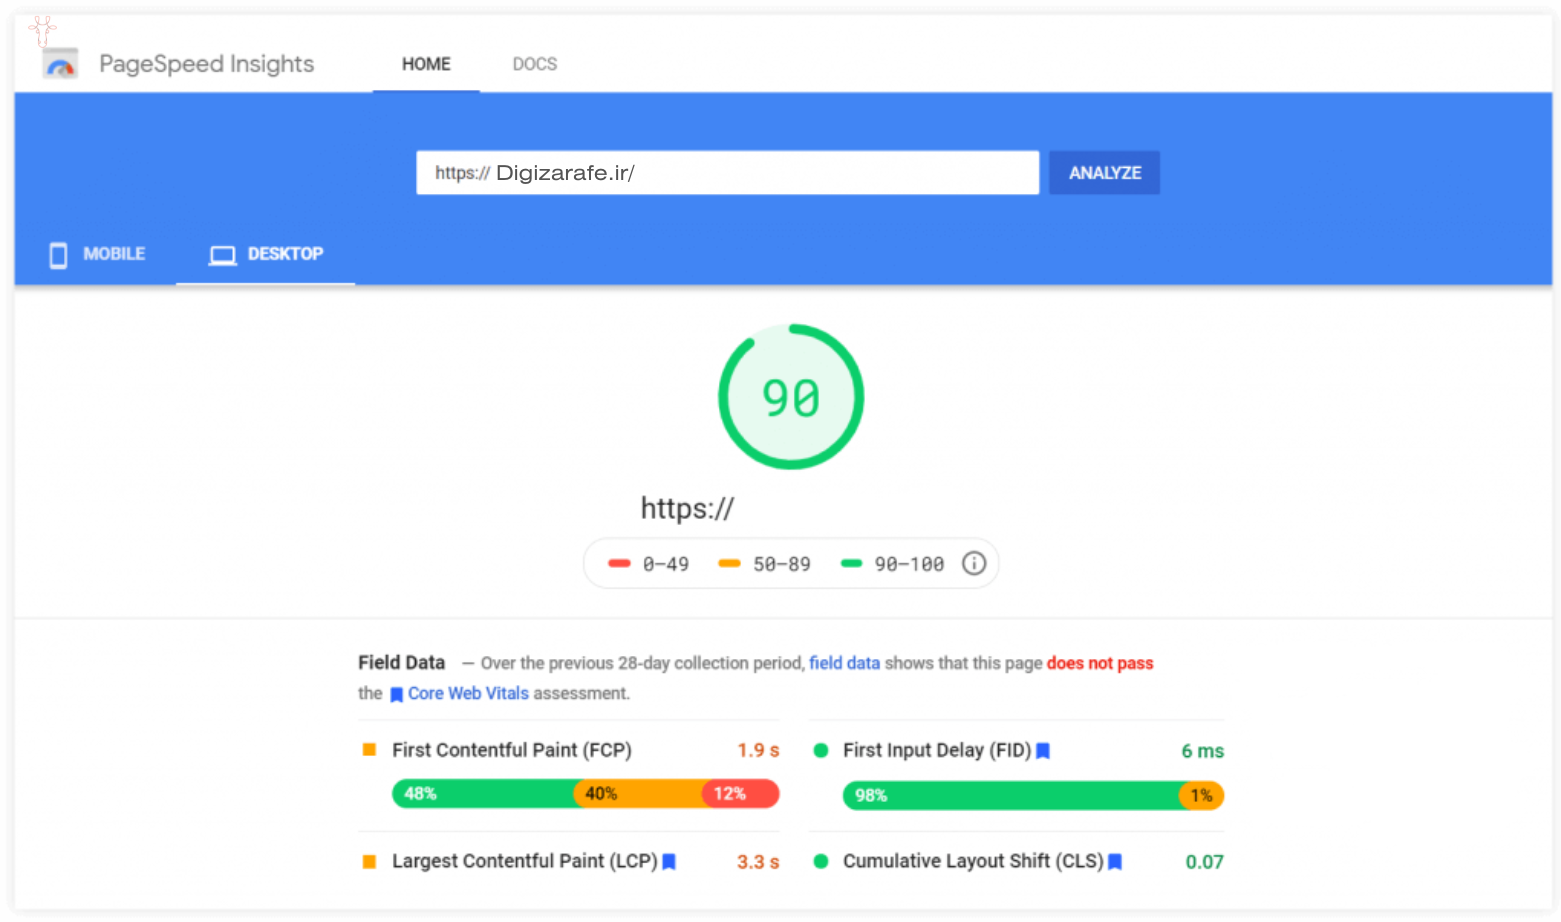
Site speed review and analysis
Now, let’s take a closer look at the best practices to keep your page speed at a satisfactory level:
1. Use quality web hosting(s)
Your web hosting is the number one thing that affects your page speed. If your host has poor server response times, there’s little you can do to improve them. You don’t have to worry about milliseconds, but don’t expect great performance from providers that offer hosting for $0.10 per month.
Note: Most beginners and small website owners will do fine with quality shared hosting. It’s affordable and can be upgraded in the future if needed.
Lastly, make sure the physical location of the server is as close as possible to your target audience (e.g. if you are targeting the US market, your server should not be in Germany).
2. Cache implementation
Caching is the process of remembering parts of your page (either by the server or the visitor’s browser) so that the next time it loads, it will load much faster. There are two main types of caching:
- Browser Cache: Caching is done on the client side. If you use WordPress, you can use one of the many plugins like WP Rocket or W3 Total Cache (always use only one!)
- Server-side caching: Runs at a low level and is more efficient. It is usually provided by managed web hosting services.
3. Consider AMP
Accelerated Mobile Pages technology enables faster delivery of content to mobile devices. In practice, this means that content is presented in a simpler, more streamlined version of your page on smartphones. This can be very useful for content-heavy websites (such as news magazines or larger blogs). If you have a WordPress website, there is an official AMP plugin that will help you implement it.
4. Restrict third-party scripts
Every third-party script you use on your website adds time to the page load time. This includes:
- WordPress plugins
- Analytics and remarketing scripts
- Commenting services (e.g. Disqus)
- Chat widgets
This doesn’t mean you shouldn’t use any of these. Just follow these simple rules:
- Only use the services you really need. This is especially important with WordPress plugins. Don’t use a specific plugin for every small feature on your website. Too many plugins can slow down your website.
- If possible, delay the activation of third-party scripts so that they only load after a few seconds or when the visitor scrolls down the page. This can be applied to commenting services as well as chat widgets.
5. Optimize your images
Large image files are one of the most common factors that cause slow page loading. Here are a few image optimization practices you should follow to make sure your images aren’t too large:
A) Use the appropriate file type (format)
Using the right image file format can help you get better image quality and reduce file size.
- JPEG: Photo
- PNG: Line drawings, screenshots, images that contain text
- GIF: Animated images
- SVG: Logos, icons, simple images
b) Resize your images
Many people upload images that are too large. If your blog content is 800 pixels wide, it is a complete mistake to use images that are 2500 pixels wide. Before uploading your image to the server, use an image editor to resize the image to fit the width of your website.
c) Compress your images
Image compression is the process of removing some of the unnecessary data from an image while maintaining the image quality. You can do this manually and try to find the best ratio between quality and file size, or have a plugin do the whole process automatically (like Imagify, ShortPixel, Tiny PNG).
d) Consider lazy loading
Lazy loading is a simple process where content that is visible at the top of the page is prioritized and the rest is loaded a little later. This is usually very useful for pages with a lot of images.
Take a look at this simple guide to choosing the right image file type:
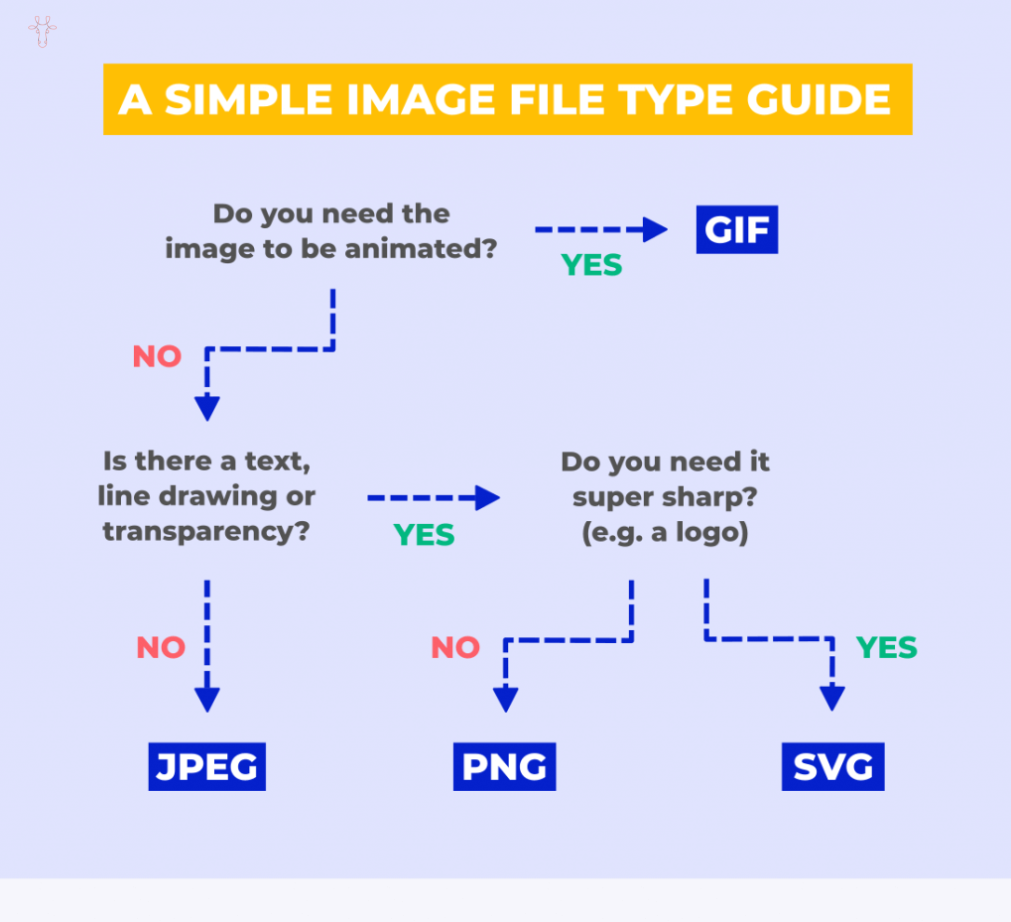
Select the image file format
Image alt texts
Image alt text (also called an alt tag) is a piece of text in HTML code that describes the image and appears if the image cannot be loaded. It is very important for 2 reasons:
- From a UX perspective: Someone who has accessed the page can read the alternative text (alt tag) when they are unable to load the image.
- From an SEO perspective: Alt text provides a better context for crawlers because they can’t “see” your image.
To write good alt text, you should:
- Be descriptive: Describe the image in the best way possible.
- Keep it short: 5 to 10 words should be fine.
- Avoid keyword stuffing: Alt text is not a place to stuff your keywords unnaturally.
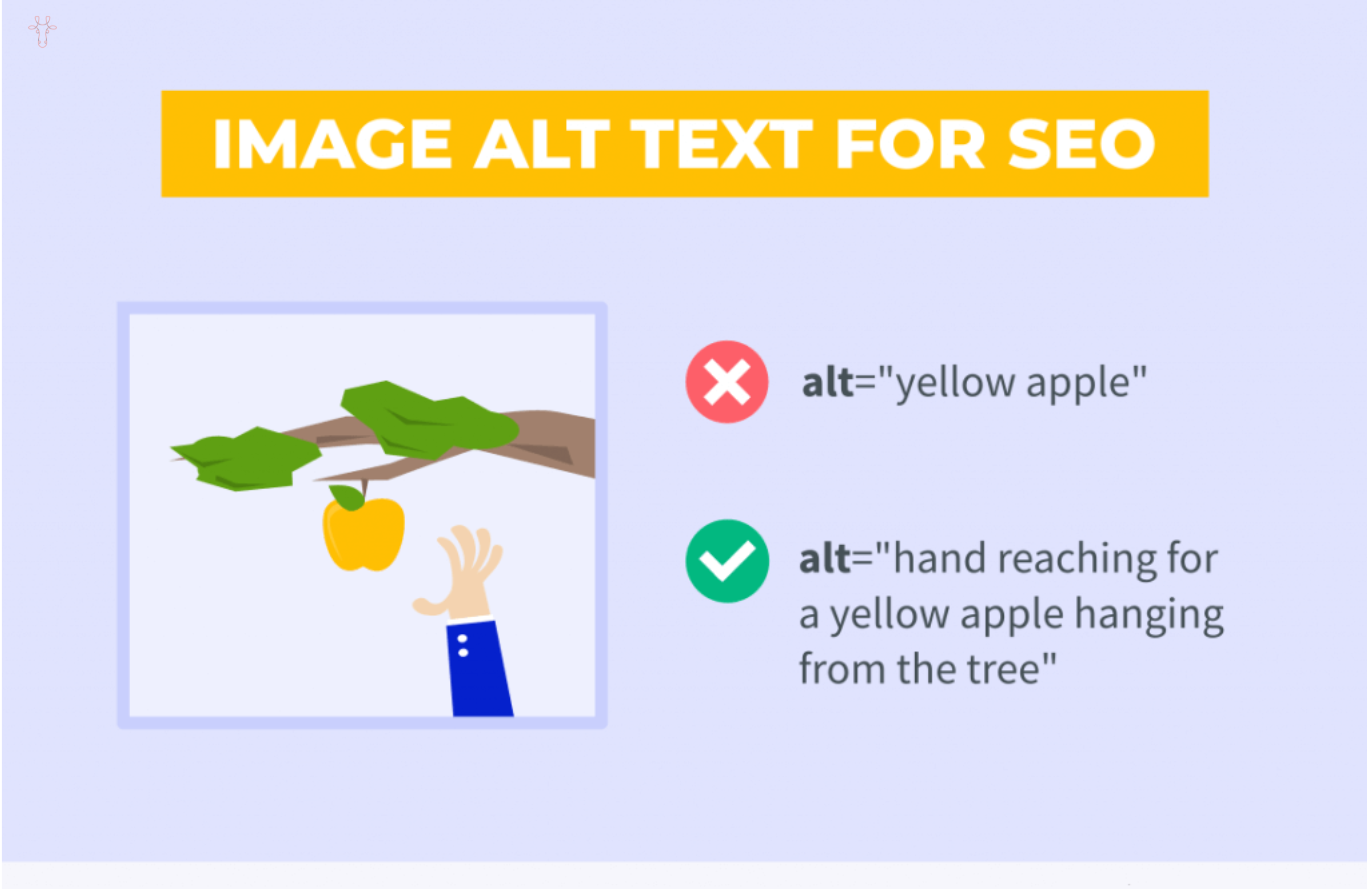
Alt tag or image alternative tag
In addition to alt text, you should also use the following:
- Describe the names of the images! (learning SEO.jpeg is always better than DCIM1523.jpeg)
- Image title and description
- Subtitles (optional)
Title tags and meta descriptions
Title tags and meta descriptions are HTML elements that display the title and description of a page. They are displayed in search results or when the page is shared on social media. They are very important from an SEO point of view. A well-written title tag and meta description are your only chance to grab a user’s attention in the SERP.
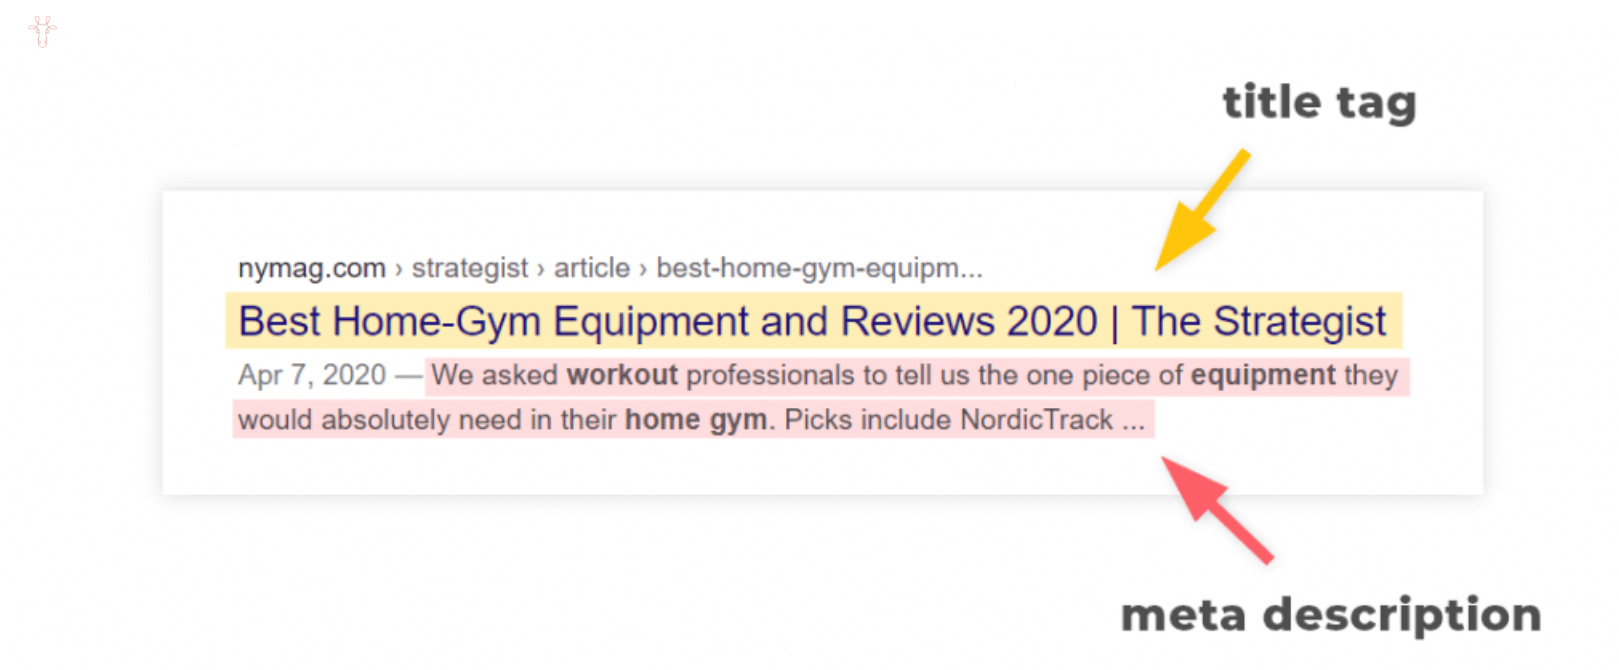
Meta description and title tag
Here are some tips on how to write a good title tag and meta description:
1. Enter the focused keyword
As we mentioned in the previous chapter, a page’s title tag and meta description are good places to put your focus keyword. It’s best to place your focus keyword near the beginning of the title tag, although it’s not mandatory.
2. Be careful about content length
The length limit is 600 pixels for title tags and 960 pixels for meta descriptions. If they are too long, they will be truncated by Google, which doesn’t look good and can reduce your click-through rate.
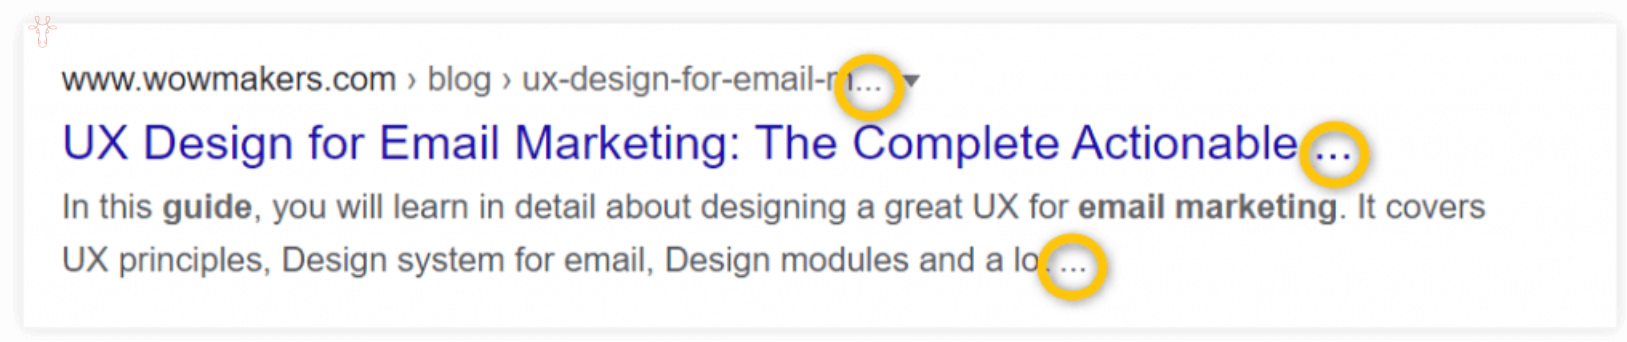
Inappropriate meta description length
3. Be unique.
Here are some elements you can use to make your title tag unique:
- question
- number
- year
- Brackets
- Your brand name
Featured snippets
A featured snippet (sometimes called “position zero”) is a selected search result that appears above the 10 standard results in Google Search. It aims to directly answer the user’s question in the SERP. Here’s a typical example:

Featured snippets
There are 3 main types of highlight pieces:
- Paragraph: Usually a short answer to a how, who, why, when, or what question.
- List: Mostly step-by-step instructions or recipes
- Table: Often shown for comparison charts, data tables, etc.
The biggest advantage of having a featured snippet is that you can gain an edge over your competitors even if your page has a lower position. Many of the pages that appear in featured snippets don’t rank first. They usually appear in second, third, or even lower positions.
So, how do you get a featured piece?
1. Look for keywords with featured snippets
A great place to start is a keyword research tool where you can specifically search for “asked” keywords. A great source of keywords with featured snippets is the so-called “People also ask” box that often appears below the featured snippet.
2. Answer the question first.
The key to appearing in the featured piece is to answer the question on the page as quickly as possible. This writing style is called the “inverted pyramid writing style.” This means that you first provide the definition and then move on to the supporting details.
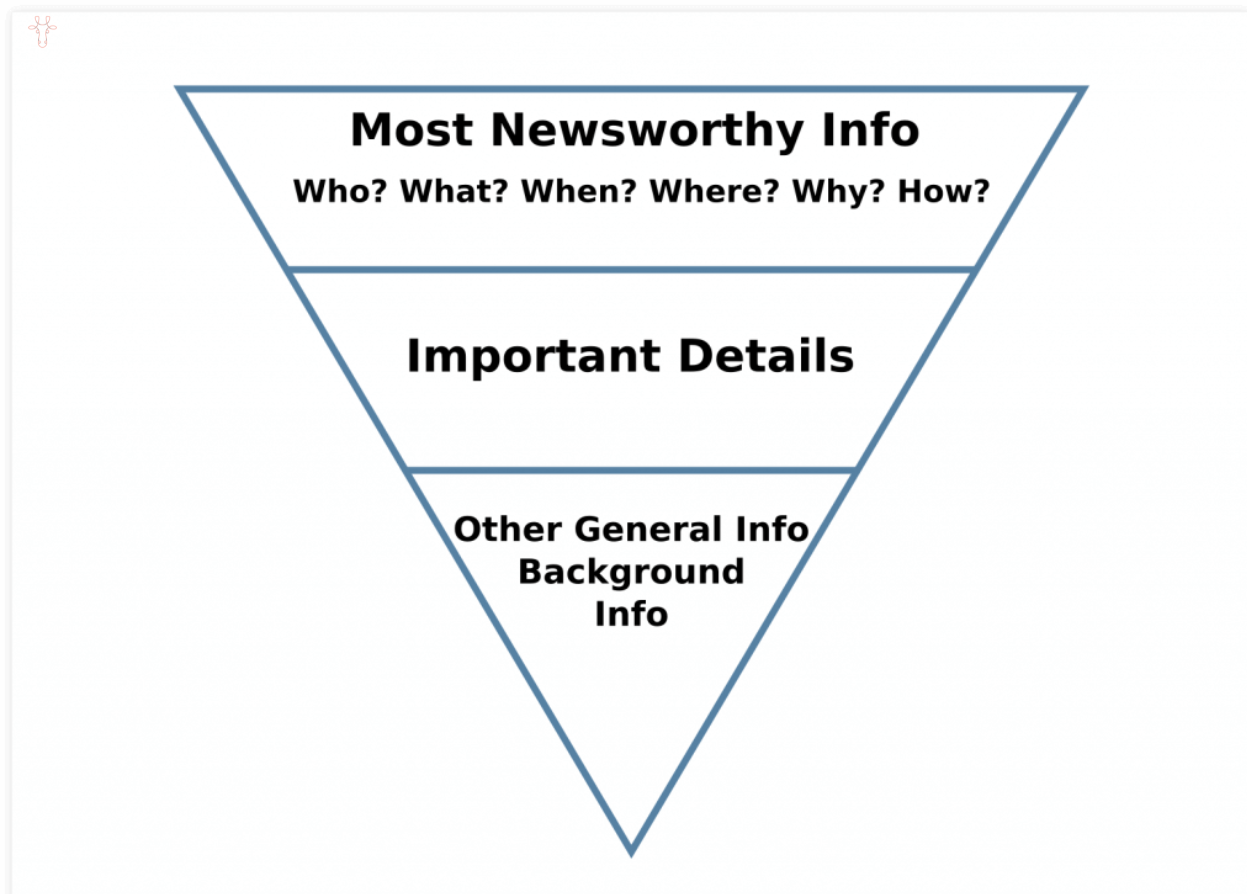
Important points about featured snippets (FAQs)
3. Follow the optimal word count
You can’t specify exactly what text should appear in a featured snippet. Google will automatically select a portion of your text. However, you should optimize the length of your rich snippet to match the length of the typical featured snippet. Most featured snippets are 40-50 words long. This brings us to the last point… (We talked about creating SEO-friendly content in a previous lesson, which you can refer to)
4. See what works for your competitors
Last but not least, take advantage of the fact that there is an existing featured snippet and get inspired by what works for your competition. Consider things like:
- Section type (paragraph, list, table)
- Text length
- Placing text on the page
- The presence of images